Welcome to ANDROID Developer!

Friday, May 23, 2014

Creating Simple Shopping Cart with PHP


Shopping Cart is very important part of any online store, it not only lets users to accumulate list of items for final purchase, but also calculates a total amount for the order. Since my last article on PayPal Express Checkout with PHP, I have received few emails from readers asking how to create simple PHP session based shopping cart for the website. So, keeping that in mind, today we will create a simple but working online shopping cart step by step, which can be integrated easily in any website that runs on PHP.
PHP shopping cart
I have created 4 files for our shopping cart:
  1. Config.php (MySql credentials)
  2. Index.php (list of product information from database)
  3. Cart_update.php (Updates cart items and redirects back to products list page)
  4. View_cart.php (Product summery view before the payment)

Products Information

All our products information should be stored in MySql table, lets create a table named “products”, you can insert the products details manually using PhpMyAdmin, OR there’s also a mysql file in downloadable zip, which you can import in database to get the table and the product details.
 
1
2
3
4
5
6
7
8
9
10
CREATE TABLE IF NOT EXISTS `products` (
  `id` int(11) NOT NULL AUTO_INCREMENT,
  `product_code` varchar(60) NOT NULL,
  `product_name` varchar(60) NOT NULL,
  `product_desc` tinytext NOT NULL,
  `product_img_name` varchar(60) NOT NULL,
  `price` decimal(10,2) NOT NULL,
  PRIMARY KEY (`id`),
  UNIQUE KEY `product_code` (`product_code`)
) AUTO_INCREMENT=1 ;
Once you create the table, you can create a list of products, similar to picture below:
Product Details

Configuration

Main purpose of the config file is to store different information we need for our script. Just enter the MySql details in the configuration file.
 
1
2
3
4
5
6
7
8
<?php
$currency = '$';
$db_username = 'root';
$db_password = '';
$db_name = 'demo';
$db_host = 'localhost';
$mysqli = new mysqli($db_host, $db_username, $db_password,$db_name);
?>

Product List (Index.php)

This will be the page where you want to display the list the products you want to sell to buyers. If you have lots of products, it is better to group them in pages using some sort of pagination. And on the right side of the page will be our shopping-cart box, which will keep track of items user going to purchase later.
Since we are working with sessions, we must activate PHP session in our script by including session_start() on top of the code, then we can start writing codes or include file:
 
1
2
3
4
<?php
session_start();
include_once("config.php");
?>

Listing Products from Database

We will basically fetch the records from database and display them on the page. We will also create a HTML form with Add to Cart button. It doesn’t matter how you are planing to display them, the important part here is the HTML form. Notice the hidden input values? each item contains a form with these hidden values, product code and the return URL, which we will send to cart_update.php using POST method.
 
1
2
3
4
5
6
7
8
9
10
11
12
13
14
15
16
17
18
19
20
21
22
23
24
25
26
27
28
<div class="products">
<?php
//current URL of the Page. cart_update.php redirects back to this URL
$current_url = base64_encode("http://".$_SERVER['HTTP_HOST'].$_SERVER['REQUEST_URI']);
   
    $results = $mysqli->query("SELECT * FROM products ORDER BY id ASC");
    if ($results) {
        //output results from database
        while($obj = $results->fetch_object())
        {
           
            echo '<div class="product">';
            echo '<form method="post" action="cart_update.php">';
            echo '<div class="product-thumb"><img src="images/'.$obj->product_img_name.'"></div>';
            echo '<div class="product-content"><h3>'.$obj->product_name.'</h3>';
            echo '<div class="product-desc">'.$obj->product_desc.'</div>';
            echo '<div class="product-info">Price '.$currency.$obj->price.' <button class="add_to_cart">Add To Cart</button></div>';
            echo '</div>';
            echo '<input type="hidden" name="product_code" value="'.$obj->product_code.'" />';
            echo '<input type="hidden" name="type" value="add" />';
            echo '<input type="hidden" name="return_url" value="'.$current_url.'" />';
            echo '</form>';
            echo '</div>';
        }
   
}
?>
</div>

Shopping Cart Box

On the right side of the page we will display small shopping cart box to keep track of user items. The main task of the shopping-cart is to look for session variable called $_SESSION["products"], which holds the collection of user items in an array, and then retrieve and display its content in the box.
 
1
2
3
4
5
6
7
8
9
10
11
12
13
14
15
16
17
18
19
20
21
22
23
24
25
26
27
<div class="shopping-cart">
<h2>Your Shopping Cart</h2>
<?php
if(isset($_SESSION["products"]))
{
    $total = 0;
    echo '<ol>';
    foreach ($_SESSION["products"] as $cart_itm)
    {
        echo '<li class="cart-itm">';
        echo '<span class="remove-itm"><a href="cart_update.php?removep='.$cart_itm["code"].'&return_url='.$current_url.'">&times;</a></span>';
        echo '<h3>'.$cart_itm["name"].'</h3>';
        echo '<div class="p-code">P code : '.$cart_itm["code"].'</div>';
        echo '<div class="p-qty">Qty : '.$cart_itm["qty"].'</div>';
        echo '<div class="p-price">Price :'.$currency.$cart_itm["price"].'</div>';
        echo '</li>';
        $subtotal = ($cart_itm["price"]*$cart_itm["qty"]);
        $total = ($total + $subtotal);
    }
    echo '</ol>';
    echo '<span class="check-out-txt"><strong>Total : '.$currency.$total.'</strong> <a href="view_cart.php">Check-out!</a></span>';
    echo '<span class="empty-cart"><a href="cart_update.php?emptycart=1&return_url='.$current_url.'">Empty Cart</a></span>';
}else{
    echo 'Your Cart is empty';
}
?>
</div>

Updating Cart

The role of the Cart_update.php is to add and remove items in the shopping cart. When user clicks “Add to Cart” button, the form sends some hidden values such as product code and quantity to Cart_update.php using POST method, which we will use to retrieve product info from the database verifying the existence of the product, and then we create or update $_SESSION["products"] with new array variables. Removing item works similar way, please go though comment lines below, most of the code is self explanatory.
 
1
2
3
4
5
6
7
8
9
10
11
12
13
14
15
16
17
18
19
20
21
22
23
24
25
26
27
28
29
30
31
32
33
34
35
36
37
38
39
40
41
42
43
44
45
46
47
48
49
50
51
52
53
54
55
56
57
58
59
60
61
62
63
64
65
66
67
68
69
70
71
72
73
74
75
76
77
78
79
80
81
82
83
84
85
86
87
88
89
<?php
session_start(); //start session
include_once("config.php"); //include config file

//empty cart by distroying current session
if(isset($_GET["emptycart"]) && $_GET["emptycart"]==1)
{
    $return_url = base64_decode($_GET["return_url"]); //return url
    session_destroy();
    header('Location:'.$return_url);
}

//add item in shopping cart
if(isset($_POST["type"]) && $_POST["type"]=='add')
{
    $product_code   = filter_var($_POST["product_code"], FILTER_SANITIZE_STRING); //product code
    $product_qty    = filter_var($_POST["product_qty"], FILTER_SANITIZE_NUMBER_INT); //product code
    $return_url     = base64_decode($_POST["return_url"]); //return url
   
    //limit quantity for single product
    if($product_qty > 10){
        die('<div align="center">This demo does not allowed more than 10 quantity!<br /><a href="http://sanwebe.com/assets/paypal-shopping-cart-integration/">Back To Products</a>.</div>');
    }

    //MySqli query - get details of item from db using product code
    $results = $mysqli->query("SELECT product_name,price FROM products WHERE product_code='$product_code' LIMIT 1");
    $obj = $results->fetch_object();
   
    if ($results) { //we have the product info
       
        //prepare array for the session variable
        $new_product = array(array('name'=>$obj->product_name, 'code'=>$product_code, 'qty'=>$product_qty, 'price'=>$obj->price));
       
        if(isset($_SESSION["products"])) //if we have the session
        {
            $found = false; //set found item to false
           
            foreach ($_SESSION["products"] as $cart_itm) //loop through session array
            {
                if($cart_itm["code"] == $product_code){ //the item exist in array

                    $product[] = array('name'=>$cart_itm["name"], 'code'=>$cart_itm["code"], 'qty'=>$product_qty, 'price'=>$cart_itm["price"]);
                    $found = true;
                }else{
                    //item doesn't exist in the list, just retrive old info and prepare array for session var
                    $product[] = array('name'=>$cart_itm["name"], 'code'=>$cart_itm["code"], 'qty'=>$cart_itm["qty"], 'price'=>$cart_itm["price"]);
                }
            }
           
            if($found == false) //we didn't find item in array
            {
                //add new user item in array
                $_SESSION["products"] = array_merge($product, $new_product);
            }else{
                //found user item in array list, and increased the quantity
                $_SESSION["products"] = $product;
            }
           
        }else{
            //create a new session var if does not exist
            $_SESSION["products"] = $new_product;
        }
       
    }
   
    //redirect back to original page
    header('Location:'.$return_url);
}

//remove item from shopping cart
if(isset($_GET["removep"]) && isset($_GET["return_url"]) && isset($_SESSION["products"]))
{
    $product_code   = $_GET["removep"]; //get the product code to remove
    $return_url     = base64_decode($_GET["return_url"]); //get return url

   
    foreach ($_SESSION["products"] as $cart_itm) //loop through session array var
    {
        if($cart_itm["code"]!=$product_code){ //item does,t exist in the list
            $product[] = array('name'=>$cart_itm["name"], 'code'=>$cart_itm["code"], 'qty'=>$cart_itm["qty"], 'price'=>$cart_itm["price"]);
        }
       
        //create a new product list for cart
        $_SESSION["products"] = $product;
    }
   
    //redirect back to original page
    header('Location:'.$return_url);
}

View Item Summary

Now we have everything ready, its time for final page where user can view their products and proceed to payment. It’s good idea to add taxes, shipping and transaction fees along with total amount in this page for the users to see. You can generate any type of data here for the Payment gateway, most Payment gateway prefer HTML form, so I have create some hidden input fields, you can modify them to suit your needs.
 
1
2
3
4
5
6
7
8
9
10
11
12
13
14
15
16
17
18
19
20
21
22
23
24
25
26
27
28
29
30
31
32
33
34
35
36
37
38
39
40
41
42
43
44
<?php
session_start();
include_once("config.php");
    if(isset($_SESSION["products"]))
    {
        $total = 0;
        echo '<form method="post" action="PAYMENT-GATEWAY">';
        echo '<ul>';
        $cart_items = 0;
        foreach ($_SESSION["products"] as $cart_itm)
        {
           $product_code = $cart_itm["code"];
           $results = $mysqli->query("SELECT product_name,product_desc, price FROM products WHERE product_code='$product_code' LIMIT 1");
           $obj = $results->fetch_object();
         
            echo '<li class="cart-itm">';
            echo '<span class="remove-itm"><a href="cart_update.php?removep='.$cart_itm["code"].'&return_url='.$current_url.'">&times;</a></span>';
            echo '<div class="p-price">'.$currency.$obj->price.'</div>';
            echo '<div class="product-info">';
            echo '<h3>'.$obj->product_name.' (Code :'.$product_code.')</h3> ';
            echo '<div class="p-qty">Qty : '.$cart_itm["qty"].'</div>';
            echo '<div>'.$obj->product_desc.'</div>';
            echo '</div>';
            echo '</li>';
            $subtotal = ($cart_itm["price"]*$cart_itm["qty"]);
            $total = ($total + $subtotal);

            echo '<input type="hidden" name="item_name['.$cart_items.']" value="'.$obj->product_name.'" />';
            echo '<input type="hidden" name="item_code['.$cart_items.']" value="'.$product_code.'" />';
            echo '<input type="hidden" name="item_desc['.$cart_items.']" value="'.$obj->product_desc.'" />';
            echo '<input type="hidden" name="item_qty['.$cart_items.']" value="'.$cart_itm["qty"].'" />';
            $cart_items ++;
           
        }
        echo '</ul>';
        echo '<span class="check-out-txt">';
        echo '<strong>Total : '.$currency.$total.'</strong>  ';
        echo '</span>';
        echo '</form>';
       
    }else{
        echo 'Your Cart is empty';
    }
?>
Continue to PHP Shopping Cart to PayPal Payment Gateway.

Multiple Items PHP Shopping Cart to PayPal


In the previous post, we had created a simple PHP session based shopping cart, now in this article we will integrating this shopping cart with our PayPal express checkout system. Main idea is to let users buy multiple items using PayPal, shopping cart collects the items users want to buy and then they’ll be able to pay for multiple items using their PayPal account.
Before we start, I suggest you go through both articles Creating Shopping cart and PayPal express checkout, to understand how they work.
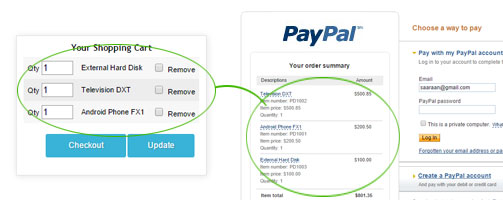
I’ve just made few modification in view_cart.php (Creating Shopping cart) and process.php (PayPal express checkout) and that’s all we need to make it work. When the users click Pay Now button in view_cart.php, they are sent directly to process.php for further PayPal payment, similar to the picture below.
Shopping Cart to Paypal

View Cart Form

As discussed above, in previous article I’ve talked about items summary (view_cart.php), the final page where users review the items they are going to buy for the last time before buying. There we had created a form which is suppose to collect the items and post it to some payment gateway. We just need to modify the form part here, and point it to process.php, which is located in PayPal Express checkout folder. The final page (view_cart.php) generates a HTML form similar to code below:
 
1
2
3
4
5
6
7
8
9
10
11
12
13
14
15
16
<form method="post" action="paypal-express-checkout/process.php">
    Android Phone FX1 (Code :PD1001)
    Qty : 1</div>
    <input type="hidden" name="item_name[0]" value="Android Phone FX1">
    <input type="hidden" name="item_code[0]" value="PD1001">
    <input type="hidden" name="item_price[0]" value="200.50">
    <input type="hidden" name="item_qty[0]" value="1">
   
    Television DXT (Code :PD1002)
    Qty : 1
    <input type="hidden" name="item_name[1]" value="Television DXT">
    <input type="hidden" name="item_code[1]" value="PD1002">
    <input type="hidden" name="item_price[1]" value="500.85">
    <input type="hidden" name="item_qty[1]" value="1">
    <input type="submit" value="Pay Now">
</form>

Paypal Express Checkout

So in the process.php we just need to collect the POST array variable named “item_name”, we then calculate the quantity and total amount and send it to PayPal. Have a look at the code below.
 
1
2
3
4
5
6
7
8
9
10
11
12
13
14
15
16
17
18
19
20
21
22
23
24
25
26
27
28
29
30
31
32
33
34
35
36
37
38
39
40
41
42
43
44
45
46
47
48
49
50
51
52
53
54
55
56
if($_POST) //Post Data received from product list page.
{
    //Other important variables like tax, shipping cost
    $TotalTaxAmount     = 2.58;  //Sum of tax for all items in this order.
    $HandalingCost      = 2.00;  //Handling cost for this order.
    $InsuranceCost      = 1.00;  //shipping insurance cost for this order.
    $ShippinDiscount    = -3.00; //Shipping discount for this order. Specify this as negative number.
    $ShippinCost        = 3.00; //Although you may change the value later, try to pass in a shipping amount that is reasonably accurate.

    //we need 4 variables from an item, Item Name, Item Price, Item Number and Item Quantity.
    $paypal_data = '';
    $ItemTotalPrice = 0;

    //loop through POST array
    foreach($_POST['item_name'] as $key=>$itmname)
    {
        //get actual product price from database using product code
       $product_code    = filter_var($_POST['item_code'][$key], FILTER_SANITIZE_STRING);
       
        $results = $mysqli->query("SELECT price FROM products WHERE product_code='$product_code' LIMIT 1");
        $obj = $results->fetch_object();

        $paypal_data .= '&L_PAYMENTREQUEST_0_NAME'.$key.'='.urlencode($_POST['item_name'][$key]);
        $paypal_data .= '&L_PAYMENTREQUEST_0_NUMBER'.$key.'='.urlencode($_POST['item_code'][$key]);
        $paypal_data .= '&L_PAYMENTREQUEST_0_AMT'.$key.'='.urlencode($obj->price);     
        $paypal_data .= '&L_PAYMENTREQUEST_0_QTY'.$key.'='. urlencode($_POST['item_qty'][$key]);
       
        // item price X quantity
        $subtotal = ($obj->price*$_POST['item_qty'][$key]);
       
        //total price
        $ItemTotalPrice = ($ItemTotalPrice + $subtotal);
    }

    //parameters for SetExpressCheckout
    $padata =   '&METHOD=SetExpressCheckout'.
                '&RETURNURL='.urlencode($PayPalReturnURL ).
                '&CANCELURL='.urlencode($PayPalCancelURL).
                '&PAYMENTREQUEST_0_PAYMENTACTION='.urlencode("SALE").
                $paypal_data.              
                '&NOSHIPPING=0'. //set 1 to hide buyer's shipping address
                '&PAYMENTREQUEST_0_ITEMAMT='.urlencode($ItemTotalPrice).
                '&PAYMENTREQUEST_0_TAXAMT='.urlencode($TotalTaxAmount).
                '&PAYMENTREQUEST_0_SHIPPINGAMT='.urlencode($ShippinCost).
                '&PAYMENTREQUEST_0_HANDLINGAMT='.urlencode($HandalingCost).
                '&PAYMENTREQUEST_0_SHIPDISCAMT='.urlencode($ShippinDiscount).
                '&PAYMENTREQUEST_0_INSURANCEAMT='.urlencode($InsuranceCost).
                '&PAYMENTREQUEST_0_AMT='.urlencode($GrandTotal).
                '&PAYMENTREQUEST_0_CURRENCYCODE='.urlencode($PayPalCurrencyCode).
                '&LOCALECODE=GB'. //PayPal pages to match the language on your website.
                '&LOGOIMG=http://www.sanwebe.com/wp-content/themes/sanwebe/img/logo.png'. //site logo
                '&CARTBORDERCOLOR=FFFFFF'. //border color of cart
                '&ALLOWNOTE=1';
   

}
That’s it, this is the main modification here, rest is explained in my previous post PayPal express checkout. Without making things further complicated, I want you to download and test the script yourself, but nothing is perfect, so if you want to leave some feedback or improvement suggestions please do so by commenting below. Good luck!

PHP Cache Dynamic Pages To Speed Up Load Times


If your website has hundreds of pages with many visitors everyday, you might want to implement some sort of caching mechanism for your website to speed up page loading time. Each client-server request consist of multiple database queries, server response and the processing time increasing overall page loading time. The most common solution is to make copies of dynamic pages called cache files and store them in a separate directory, which can later be served as static pages instead of re-generating dynamic pages again and again.

Understanding Dynamic pages & Cache Files

Cache files are static copies generated by dynamic pages, these files are generated one time and stored in separate folder until it expires, and when user requests the content, the same static file is served instead of dynamically generated pages, hence bypassing the need of regenerating HTML and requesting results from database over and over again using server-side codes. For example, running several database queries, calculating and processing PHP codes to the HTML output takes certain seconds, increasing overall page loading time with dynamic page, but a cached file consist of just plain HTML codes, you can open it in any text editor or browser, which means it doesn’t require processing time at all.
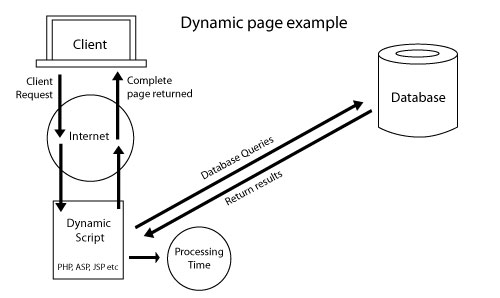
Dynamic page :— The example in the picture below shows how a dynamic page is generated. As its name says, it’s completely dynamic, it talks to database and generates the HTML output according to different variables user provides during the request. For example a user might want to list all the books by a particular author, it can do that by sending queries to database and generating fresh HTML content, but each request requires few seconds to process also the certain server memory is used, which is not a big deal if website receives very few visitors. However, consider hundreds of visitors requesting and generating dynamic pages from your website over and over again, it will considerably increase the pressure, resulting delayed output and HTTP errors on the client’s browser.
Dynamic page example
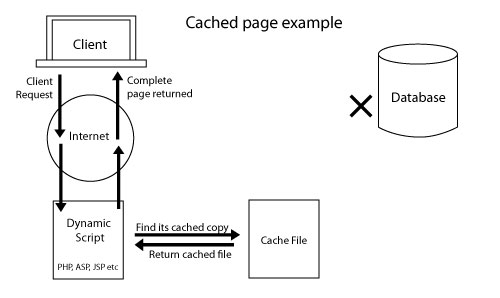
Cached File :— Picture below illustrates how cached files are served instead of dynamic pages, as explained above the cached files are nothing but static web pages. They contain plain HTML code, the only way the content of the cached page will change is if the Web developer manually edits the file. As you can see cached files neither require database connectivity nor the processing time, it is an ideal solution to reduce server pressure and page loading time consistently.
Serving Cached File Example

PHP Caching

There are other ways to cache dynamic pages using PHP, but the most common method everyone’s been using is PHP Output Buffer and Filesystem Functions, combining these two methods we can have magnificent caching system.
PHP Output buffer :— It interestingly improves performance and decreases the amount of time it takes to download, because the output is not being sent to browser in pieces but the whole HTML page as one variable. The method is insanely simple take a look at the code below :
 
1
2
3
4
5
6
7
<?php
ob_start(); // start the output buffer

/* the content */
ob_get_contents();  gets the contents of the output buffer
ob_end_flush(); // Send the output and turn off output buffering
?>
When you call ob_start() on the top of the code, it turns output buffering on, which means anything after this will be stored in the buffer, instead of outputting on the browser. The content in the buffer can be retrieved using ob_get_contents(). You should call ob_end_flush() at the end of the code to send the output to the browser and turn buffering off.
PHP Filesystem :— You may be familiar with PHP file system, it is a part of the PHP core, which allow us to read and write the file system. Have a look at the following code.
 
1
2
3
$fp = fopen('/path/to/file.txt', 'w');  //open file for writing
fwrite($fp, 'I want to write this'); //write
fclose($fp); //Close file pointer
As you can see the first line of the code fopen() opens the file for writing, the mode ‘w’ places the file pointer at the beginning of the file and if file does not exist, it attempts to create one. Second line fwrite() writes the string to the opened file, and finally fclose() closes the successfully opened file at the beginning of the code.

Implementing PHP caching

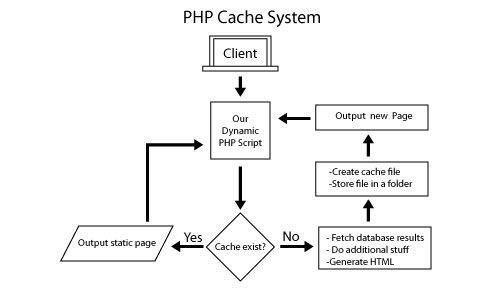
Now you should be pretty clear about PHP output buffer and filesystem, we can use these both methods to create our PHP caching system. Please have a look at the picture below, the Flowchart gives us the basic idea about our cache system.
PHP cache system in Action
The cycle starts when a user request the content, we just check whether the cache copy exist for the currently requested page, if it doesn’t exist we generate a new page, create cache copy and then output the result. If the cache already exist, we just have to fetch the file and send it to the user browser.
Take a look at the Full PHP cache code below, you can just copy and paste it in your PHP projects, it should work flawlessly as depicted in above Flowchart. You can play with the settings in the code, modify the cache expire time, cache file extension, ignored pages etc.
 
1
2
3
4
5
6
7
8
9
10
11
12
13
14
15
16
17
18
19
20
21
22
23
24
25
26
27
28
29
30
31
32
33
34
35
36
37
38
39
40
41
42
43
44
45
<?php
//settings
$cache_ext  = '.html'; //file extension
$cache_time     = 3600;  //Cache file expires afere these seconds (1 hour = 3600 sec)
$cache_folder   = 'cache/'; //folder to store Cache files
$ignore_pages   = array('', '');

$dynamic_url    = 'http://'.$_SERVER['HTTP_HOST'] . $_SERVER['REQUEST_URI'] . $_SERVER['QUERY_STRING']; // requested dynamic page (full url)
$cache_file     = $cache_folder.md5($dynamic_url).$cache_ext; // construct a cache file
$ignore = (in_array($dynamic_url,$ignore_pages))?true:false; //check if url is in ignore list

if (!$ignore && file_exists($cache_file) && time() - $cache_time < filemtime($cache_file)) { //check Cache exist and it's not expired.
    ob_start('ob_gzhandler'); //Turn on output buffering, "ob_gzhandler" for the compressed page with gzip.
    readfile($cache_file); //read Cache file
    echo '<!-- cached page - '.date('l jS \of F Y h:i:s A', filemtime($cache_file)).', Page : '.$dynamic_url.' -->';
    ob_end_flush(); //Flush and turn off output buffering
    exit(); //no need to proceed further, exit the flow.
}
//Turn on output buffering with gzip compression.
ob_start('ob_gzhandler');
######## Your Website Content Starts Below #########
?>
<!DOCTYPE html>
<html>
    <head>
        <title>Page to Cache</title>
    </head>
        <body>
            Lorem ipsum dolor sit amet, consectetur adipiscing elit. Integer ut tellus libero.
        </body>
</html>
<?php
######## Your Website Content Ends here #########

if (!is_dir($cache_folder)) { //create a new folder if we need to
    mkdir($cache_folder);
}
if(!$ignore){
    $fp = fopen($cache_file, 'w');  //open file for writing
    fwrite($fp, ob_get_contents()); //write contents of the output buffer in Cache file
    fclose($fp); //Close file pointer
}
ob_end_flush(); //Flush and turn off output buffering

?>
You must place your PHP content between the enclosed comment lines, In fact I’d suggest putting them in separate header and footer file, so that it can generate and serve cache files for all the different dynamic pages. If you read the comment lines in the code carefully, you should find it pretty much self explanatory.
  1. Get the currently requested URL location.
  2. Construct a location path for the cache file, convert URL to MD5 hash for the fixed cache file name.
  3. Check whether URL is in ignore list.
  4. Check for existing unexpired cache file, if exist, just open and output the content with gzip compression.
  5. Or else, we create a new cache file and output the HTML result with gzip compression.

Conclusion

I hope this code will help you create your own cache system for your website, I am pretty sure most PHP cache system works similar way, the mantra of cache system is to reduce database connectivity, processing time and server load. But you must avoid caching in certain types of pages, such as members area (after user logs in), search pages where results should be rendered depending on the users input, or a constantly updating homepage. Good luck!

List of Ajax, PHP and CSS Tutorials


Here’s the list of some tutorials you might find useful for your web development projects.
  1. Display Top URLs With Google Analytics API (PHP)

    Using Google API PHP Client let’s create a simple PHP page that pulls website’s top URLs from Google Analytics and updates MySql table.
  2. Voting System Youtube Style With jQuery & PHP


    Voting system can be important part of any website, especially if you want to keep track of user ratings. Let’s create a cookie based voting system, similar to YouTube like & dislike buttons (Thumbs up & Thumbs down), which can be applied to any content.
  3. Creating Multi Level Dropdown Menu CSS & jQuery


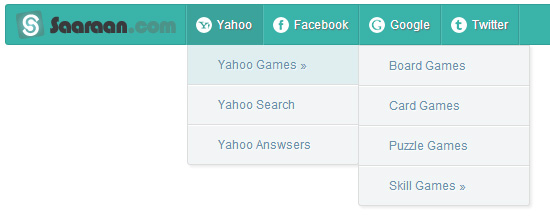
    We will be creating 3 level sub menus in pure CSS, it should work without any JavaScript, but we will add jQuery for that sliding effect.
  4. Creating Shout-Box Facebook Style


    Facebook has this nice little chat box that doesn’t take up much space, and people can instantly interact with their friends, it is a cool feature to have in any website. Let’s get inspired and create an Shout Box which will look similar to Facebook chat box.
  5. Sign-in with Micorsoft Live Connect PHP


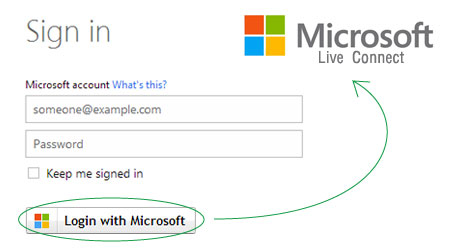
    Learn to create Microsoft Live Connect system for your website using Microsoft REST API, and access user info programmatically to register/login users.
  6. Username live check using Ajax PHP


    Let’s create a live username checking with jQuery Ajax, because standard registration is a huge turn-off for visitors, because they not only have to reload the entire page again and again, but fields like password etc also need to be re-entered every-time
  7. Add/Remove Input Fields Dynamically with jQuery


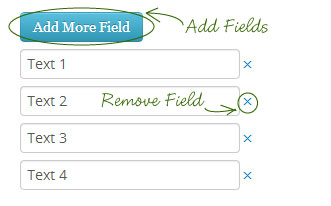
    If you are looking to add and remove duplicate input fields, here’s jQuery example below to do the task for you. This jQuery snippet adds duplicate input fields dynamically and stops when it reaches maximum.
  8. Creating Facebook ID Card with PHP Facebook SDK


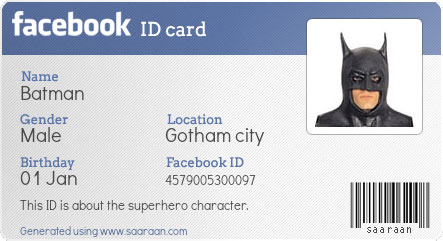
    Let’s focus on creating some authentic looking “Facebook ID” for the users using PHP and PHP Facebook SDK. With examples and sample code.
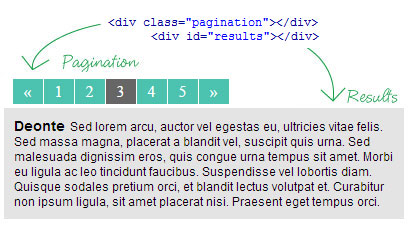
  9. Simple Ajax Pagination with jQuery & PHP


    Learn how to create simple Ajax based pagination for your MySql database records.
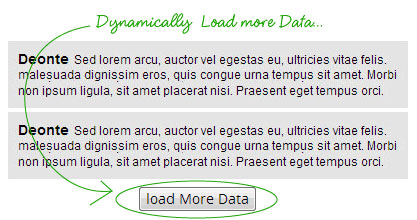
  10. Loading More Results From Database Using jQuery Ajax


    Using jQuery Ajax let users load data dynamically on a button click. No need to reload page.
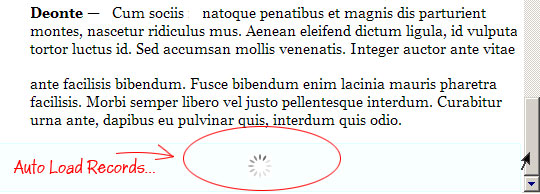
  11. Auto Load More Data On Page Scroll (jQuery/PHP)


    The technique can be seen in Twitter, Facebook and several other websites. Let’s create Ajax based auto loading script, which loads records when user scrolls to bottom of the page.
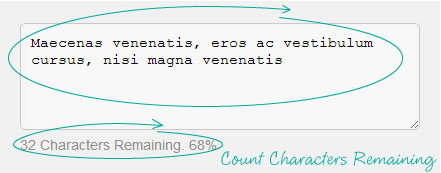
  12. Count Characters Remaining with jQuery


    Limit the number of characters user can enter in the text box, display remaining characters count as user type.
  13. Restrict multiple URLs in Input with jQuery


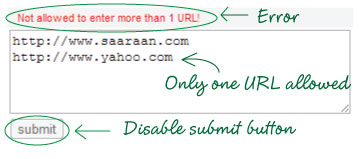
    Sometimes we may want to restrict user from entering more than one URL or prevent entering same words in text input box, with jQuery it is very simple and this snippet below can come in handy in one of those situations.
  14. PayPal Express Checkout with PHP


    Do you want to sell products online but don’t want to pay unnecessary setup fee for the payment gateway? Well you can sell products and receive money from people around the world just using free Paypal payment gateway. In this tutorial you will learn to use PHP based Paypal Express checkout to sell your products.
  15. Ajax Facebook Connect with jQuery & PHP

    Ajax Facebook Connect
    In this tutorial you will learn to connect to Facebook and let users register/login on your site easily with their Facebook name and email. All these happens without even refreshing the page.
  16. Ajax Next / Previous Picture (jQuery / PHP)


    If you are looking for a simple script to navigate next / previous image without refreshing page, this example will do exactly that using jQuery Ajax and PHP.
  17. Ajax Add & Delete MySQL records using jQuery & PHP


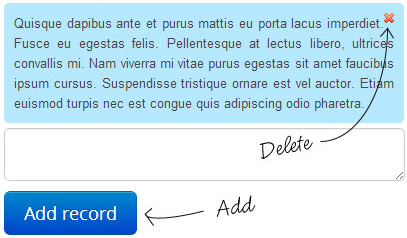
    In this basic tutorial you will learn how to use jQuery Ajax to send POST data to a PHP file and respond back with results or errors. Without having to reload the page, this Ajax technique is a very neat way to add or delete database records.
  18. Ajax Image Upload and Re-size with jQuery and PHP


    All great image gallery requires an image uploader, in this tutorial learn to create a jQuery Ajax and PHP based image uploader for your website, once the image is uploaded, script automatically creates a thumbnail and re-size the image to specified height and width.
  19. Ajax and PHP based Contact Form


    In this tutorial you’ll create simple jQuery Ajax and PHP based contact form for your website. Your visitors no longer have to reload the whole page in order to contact you. Tutorial also contains sample files which you can easily integrate with your website.
  20. Post to Facebook Page Wall

    Post To Facebook Wall
    Learn how to post pictures, status message create poll question etc. to Facebook page wall (Not User Wall) using Facebook PHP API.
  21. Creating Simple Shopping Cart with PHP


    Creating simple PHP session based shopping cart for the website.
  22. Simple Chat Using WebSocket and PHP Socket


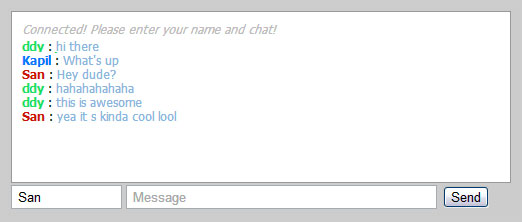
    WebSocket is a feature of HTML5 for establishing a socket connections between a web browser and a server. Let’s create a simple chat system using this cool technology (HTML5 WebSocket and PHP).

Google Map v3 Editing & Saving Markers in Database – II


In previous article I discussed about loading the Google map on a HTML page, adding-removing the markers and displaying info windows. In this article we are moving to the next step, here we are going to load markers from PHP generated XML file, and we will edit/save marker information into the database, finally creating a total custom map for the website.

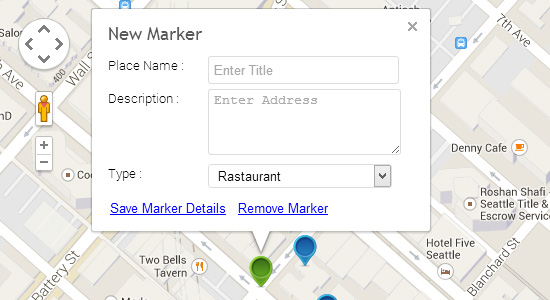
Edit Save Google Marker
I suggest you to go through previous post first, because you don’t want to get confused with markers and info windows of the map while reading this article.
In this article, I have created three functions create_marker(), remove_marker() and save_marker() to make things easier. As discussed in earlier post we can add event listeners in our JavaScript, we can simply call these function in our event listeners to do the required task.

Custom JavaScript Functions

Since our code is only going to expand, it’s a good idea to break them into small functions, so that we can just pass the arguments to these functions and use them rapidly in our programs. Take a look at these functions below, first function creates the marker with specified parameters, second one simply removes the marker from database and the map, the third function is used to save marker information into the database using jQuery ajax.

Create/Add Marker

As you can see, the create_marker function requires some familiar arguments to add a marker on the map. Map coordinates, map title, description, icon path and some boolean variables. The title and description will be used in info window, and then we add the event listeners to the marker object, which can make info window pop-open, or delete the marker from the map. The newly created markers are set as draggable, so the user can move the markers to any position before saving its information. It is bit difficult to explain each line from here, I just hope you’ll go through each comment lines, which will hopefully help you understand the codes more clearly.
 
1
2
3
4
5
6
7
8
9
10
11
12
13
14
15
16
17
18
19
20
21
22
23
24
25
26
27
28
29
30
31
32
33
34
35
36
37
38
39
40
41
42
43
44
45
46
47
48
49
50
51
52
53
54
55
56
57
58
59
60
61
62
63
64
65
66
67
68
//############### Create Marker Function ##############
function create_marker(MapPos, MapTitle, MapDesc,  InfoOpenDefault, DragAble, Removable, iconPath)
{                
    //new marker
    var marker = new google.maps.Marker({
        position: MapPos,
        map: map,
        draggable:DragAble,
        animation: google.maps.Animation.DROP,
        title:"Hello World!",
        icon: iconPath
    });
   
    //Content structure of info Window for the Markers
    var contentString = $('<div class="marker-info-win">'+
    '<div class="marker-inner-win"><span class="info-content">'+
    '<h1 class="marker-heading">'+MapTitle+'</h1>'+
    MapDesc+
    '</span><button name="remove-marker" class="remove-marker" title="Remove Marker">Remove Marker</button>'+
    '</div></div>');   

   
    //Create an infoWindow
    var infowindow = new google.maps.InfoWindow();
    //set the content of infoWindow
    infowindow.setContent(contentString[0]);

    //Find remove button in infoWindow
    var removeBtn   = contentString.find('button.remove-marker')[0];

   //Find save button in infoWindow
    var saveBtn     = contentString.find('button.save-marker')[0];

    //add click listner to remove marker button
    google.maps.event.addDomListener(removeBtn, "click", function(event) {
        //call remove_marker function to remove the marker from the map
        remove_marker(marker);
    });
   
    if(typeof saveBtn !== 'undefined') //continue only when save button is present
    {
        //add click listner to save marker button
        google.maps.event.addDomListener(saveBtn, "click", function(event) {
            var mReplace = contentString.find('span.info-content'); //html to be replaced after success
            var mName = contentString.find('input.save-name')[0].value; //name input field value
            var mDesc  = contentString.find('textarea.save-desc')[0].value; //description input field value
            var mType = contentString.find('select.save-type')[0].value; //type of marker
           
            if(mName =='' || mDesc =='')
            {
                alert("Please enter Name and Description!");
            }else{
                //call save_marker function and save the marker details
                save_marker(marker, mName, mDesc, mType, mReplace);
            }
        });
    }
   
    //add click listner to save marker button        
    google.maps.event.addListener(marker, 'click', function() {
            infowindow.open(map,marker); // click on marker opens info window
    });
     
    if(InfoOpenDefault) //whether info window should be open by default
    {
      infowindow.open(map,marker);
    }
}

Remove Marker

The remove_marker() function removes the marker from the map using the exact marker coordinates. In the database it looks for longitude and latitude values to delete a marker record. As explained earlier new markers are set to draggable, but the saved markers are not. So, here we simply check this marker draggable state and determine whether it should be removed from the map only or from database as well.
 
1
2
3
4
5
6
7
8
9
10
11
12
13
14
15
16
17
18
19
20
21
22
23
24
25
26
27
28
//############### Remove Marker Function ##############
function remove_marker(Marker)
{
    /* determine whether marker is draggable
    new markers are draggable and saved markers are fixed */

    if(Marker.getDraggable())
    {
        Marker.setMap(null); //just remove new marker
    }
    else
    {
        //Remove saved marker from DB and map using jQuery Ajax
        var mLatLang = Marker.getPosition().toUrlValue(); //get marker position
        var myData = {del : 'true', latlang : mLatLang}; //post variables
        $.ajax({
          type: "POST",
          url: "map_process.php",
          data: myData,
          success:function(data){
                Marker.setMap(null);
                alert(data);
            },
            error:function (xhr, ajaxOptions, thrownError){
                alert(thrownError); //throw any errors
            }
        });
    }
}

Save Marker

The save_marker function is used to pass the POST variables to our PHP page using jQuery Ajax, and then the variables will be stored in database. On a successful response, it replaces the HTML content of info window, sets marker draggable state to false, and also changes the icon. Don’t forget to replace icon URL in the code for your markers, or you might start wondering why your markers are’t appearing on the map.
 
1
2
3
4
5
6
7
8
9
10
11
12
13
14
15
16
17
18
19
20
21
//############### Save Marker Function ##############
function save_marker(Marker, mName, mAddress, mType, replaceWin)
{
    //Save new marker using jQuery Ajax
    var mLatLang = Marker.getPosition().toUrlValue(); //get marker position
    var myData = {name : mName, address : mAddress, latlang : mLatLang, type : mType }; //post variables
    console.log(replaceWin);       
    $.ajax({
      type: "POST",
      url: "map_process.php",
      data: myData,
      success:function(data){
            replaceWin.html(data); //replace info window with new html
            Marker.setDraggable(false); //set marker to fixed
            Marker.setIcon('http://PATH-TO-YOUR-WEBSITE-ICON/icons/pin_blue.png'); //replace icon
        },
        error:function (xhr, ajaxOptions, thrownError){
            alert(thrownError); //throw any errors
        }
    });
}

Putting Functions Together

We now have all the required functions, we can now load the Google map into the page. Whenever required these functions will be called within the code to do the specific task. In previous article the jQuery was included in the page, here too we will be using jQuery to load Google Map and to make Ajax request to PHP page.
 
1
2
3
4
5
6
7
8
9
10
11
12
13
14
15
16
17
18
19
20
21
22
23
24
25
26
27
28
29
30
31
32
33
34
35
36
37
38
39
40
41
42
43
44
45
46
47
48
49
50
51
52
53
54
55
$(document).ready(function() {
    var mapCenter = new google.maps.LatLng(47.6145, -122.3418); //Google map Coordinates
    var map;

    map_initialize(); // initialize google map
   
    //############### Google Map Initialize ##############
    function map_initialize()
    {
        var googleMapOptions =
        {
            center: mapCenter, // map center
            zoom: 17, //zoom level, 0 = earth view to higher value
            panControl: true, //enable pan Control
            zoomControl: true, //enable zoom control
            zoomControlOptions: {
            style: google.maps.ZoomControlStyle.SMALL //zoom control size
        },
            scaleControl: true, // enable scale control
            mapTypeId: google.maps.MapTypeId.ROADMAP // google map type
        };
   
        map = new google.maps.Map(document.getElementById("google_map"), googleMapOptions);        
       
        //Load Markers from the XML File, Check (map_process.php)
        $.get("map_process.php", function (data) {
            $(data).find("marker").each(function () {
                 //Get user input values for the marker from the form
                  var name      = $(this).attr('name');
                  var address   = '<p>'+ $(this).attr('address') +'</p>';
                  var type      = $(this).attr('type');
                  var point     = new google.maps.LatLng(parseFloat($(this).attr('lat')),parseFloat($(this).attr('lng')));

                  //call create_marker() function for xml loaded maker
                  create_marker(point, name, address, false, false, false, "http://PATH-TO-YOUR-WEBSITE-ICON/icons/pin_blue.png");
            });
        });
       
        //drop a new marker on right click
        google.maps.event.addListener(map, 'rightclick', function(event) {
            //Edit form to be displayed with new marker
            var EditForm = '<p><div class="marker-edit">'+
            '<form action="ajax-save.php" method="POST" name="SaveMarker" id="SaveMarker">'+
            '<label for="pName"><span>Place Name :</span><input type="text" name="pName" class="save-name" placeholder="Enter Title" maxlength="40" /></label>'+
            '<label for="pDesc"><span>Description :</span><textarea name="pDesc" class="save-desc" placeholder="Enter Address" maxlength="150"></textarea></label>'+
            '<label for="pType"><span>Type :</span> <select name="pType" class="save-type"><option value="restaurant">Rastaurant</option><option value="bar">Bar</option>'+
            '<option value="house">House</option></select></label>'+
            '</form>'+
            '</div></p><button name="save-marker" class="save-marker">Save Marker Details</button>';

            //call create_marker() function
            create_marker(event.latLng, 'New Marker', EditForm, true, true, true, "http://PATH-TO-YOUR-WEBSITE-ICON/icons/pin_green.png");
        });                            
    }
});

Database Table

To retrieve and save the marker details, I’ve create a table in the MySQL database. It’s exactly the same table from Google Store Locator example page. Just run this SQL query in your phpMyAdmin page to have this table created.
 
1
2
3
4
5
6
7
CREATE TABLE `markers` (
  `id` INT NOT NULL AUTO_INCREMENT PRIMARY KEY ,
  `name` VARCHAR( 60 ) NOT NULL ,
  `address` VARCHAR( 80 ) NOT NULL ,
  `lat` FLOAT( 10, 6 ) NOT NULL ,
  `lng` FLOAT( 10, 6 ) NOT NULL
) ENGINE = MYISAM ;

PHP XML Generator & Database Connector

Once our custom map page is created, we can now move on to server side coding with PHP, in other words, we need to create a PHP page that generates XML file for the marker, and also adds and removes the records from the database. The code below is derived from phpsqlajax_genxml.php, but I’ve modified it to implement MySQLi. The code block that saves and deletes markers from database record was added later. Code uses PHP DOMDocument to generate XML file. Saving & deletion of marker will occur only when the form data is sent with the HTTP POST method, else the file will generate XML document for the map using DB records as usual.
 
1
2
3
4
5
6
7
8
9
10
11
12
13
14
15
16
17
18
19
20
21
22
23
24
25
26
27
28
29
30
31
32
33
34
35
36
37
38
39
40
41
42
43
44
45
46
47
48
49
50
51
52
53
54
55
56
57
58
59
60
61
62
63
64
65
66
67
68
69
70
71
72
73
74
75
76
77
78
79
80
81
82
83
84
85
86
87
<?php
// database settings
$db_username = 'root';
$db_password = '';
$db_name = 'test';
$db_host = 'localhost';

//mysqli
$mysqli = new mysqli($db_host, $db_username, $db_password, $db_name);

if (mysqli_connect_errno())
{
    header('HTTP/1.1 500 Error: Could not connect to db!');
    exit();
}

################ Save & delete markers #################
if($_POST) //run only if there's a post data
{
    //make sure request is comming from Ajax
    $xhr = $_SERVER['HTTP_X_REQUESTED_WITH'] == 'XMLHttpRequest';
    if (!$xhr){
        header('HTTP/1.1 500 Error: Request must come from Ajax!');
        exit();
    }
   
    // get marker position and split it for database
    $mLatLang   = explode(',',$_POST["latlang"]);
    $mLat       = filter_var($mLatLang[0], FILTER_VALIDATE_FLOAT);
    $mLng       = filter_var($mLatLang[1], FILTER_VALIDATE_FLOAT);
   
    //Delete Marker
    if(isset($_POST["del"]) && $_POST["del"]==true)
    {
        $results = $mysqli->query("DELETE FROM markers WHERE lat=$mLat AND lng=$mLng");
        if (!$results) {
          header('HTTP/1.1 500 Error: Could not delete Markers!');
          exit();
        }
        exit("Done!");
    }
   
        //more validations are encouraged, empty fields etc.
    $mName      = filter_var($_POST["name"], FILTER_SANITIZE_STRING);
    $mAddress   = filter_var($_POST["address"], FILTER_SANITIZE_STRING);
    $mType      = filter_var($_POST["type"], FILTER_SANITIZE_STRING);
   
    $results = $mysqli->query("INSERT INTO markers (name, address, lat, lng, type) VALUES ('$mName','$mAddress',$mLat, $mLng, '$mType')");
    if (!$results) {
          header('HTTP/1.1 500 Error: Could not create marker!');
          exit();
    }
   
    $output = '<h1 class="marker-heading">'.$mName.'</h1><p>'.$mAddress.'</p>';
    exit($output);
}


################ Continue generating Map XML #################

//Create a new DOMDocument object
$dom = new DOMDocument("1.0");
$node = $dom->createElement("markers"); //Create new element node
$parnode = $dom->appendChild($node); //make the node show up

// Select all the rows in the markers table
$results = $mysqli->query("SELECT * FROM markers WHERE 1");
if (!$results) {
    header('HTTP/1.1 500 Error: Could not get markers!');
    exit();
}

//set document header to text/xml
header("Content-type: text/xml");

// Iterate through the rows, adding XML nodes for each
while($obj = $results->fetch_object())
{
  $node = $dom->createElement("marker");
  $newnode = $parnode->appendChild($node);  
  $newnode->setAttribute("name",$obj->name);
  $newnode->setAttribute("address", $obj->address);
  $newnode->setAttribute("lat", $obj->lat);
  $newnode->setAttribute("lng", $obj->lng);
  $newnode->setAttribute("type", $obj->type);  
}
echo $dom->saveXML();

Conclusion

At this point, I am sure you are able to clutch few things about Google Map, in this brief article. There are many more things you can do with your own custom map, create local directory, restaurant or the store locator, sky is the limit. I have put everything together in downloadable file, just download it from link below and try it yourself in your local testing environment. Good luck!